
|
|
| Speaker Isolation Bases |
| I purchased a new turntable while ago I was getting some
wicked Low frequency feedback with it. After reading a ton of
forums about this problem I found the solution was to build a simple
isolation base for it. The isolation base consisted of three
furniture cups with steel ball bearings, (basically a roller bearing)
under a wooden platform that the turntable was placed on. (You have to
be careful at first because the base is quite wobbly until you get some
weight on it.) I was so impressed with the sonic results I figured
why not try the same principle with my speakers. I had also read a
lot about isolation bases for speakers but never really gave it any
thought until the results I had with my turntable. It would be a simple setup like with the turntable with one exception, my speakers..... 1980's Acoustic research AR9's that weigh 130 pounds each and are five feet tall!. There was no way I would be able to pick up the speakers and place them on a wobbly platform without having the speaker fall over or kill myself and neither of those were acceptable outcomes...... I figured I would have to build isolation bases that were solid in place till the speaker was placed on them then allow the base to be free. My solution was simple, build a base consisting of two boards with the bearings in between and secure them together till the speaker was in place. So if anyone else has larger speakers and aren't sure how to get the speakers on a similar type base.... maybe the bases I made along with the pictures below will help you out. Oh, total cost.....under $60.00 for both! |
 |
 |
 |
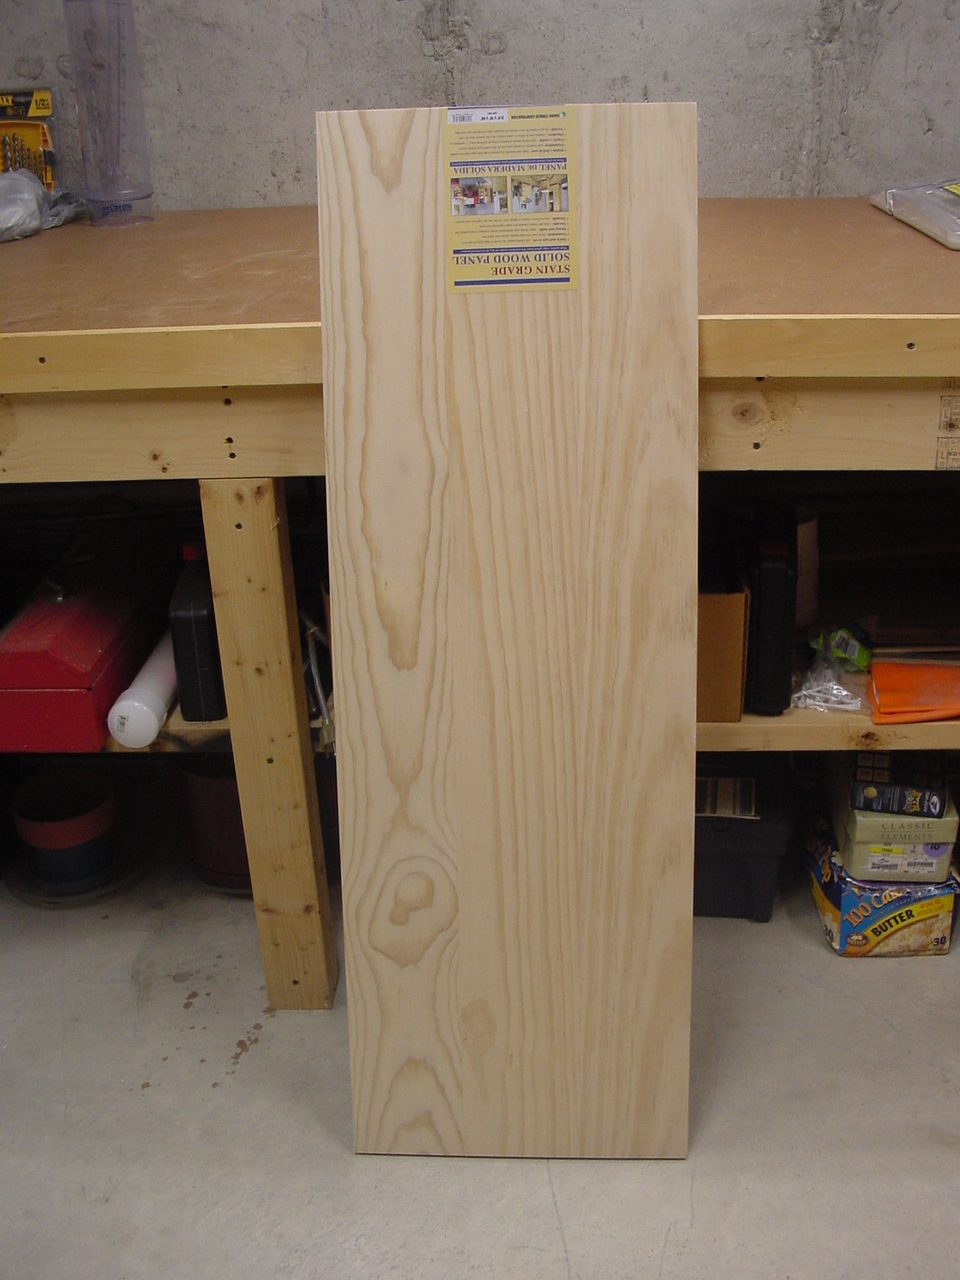
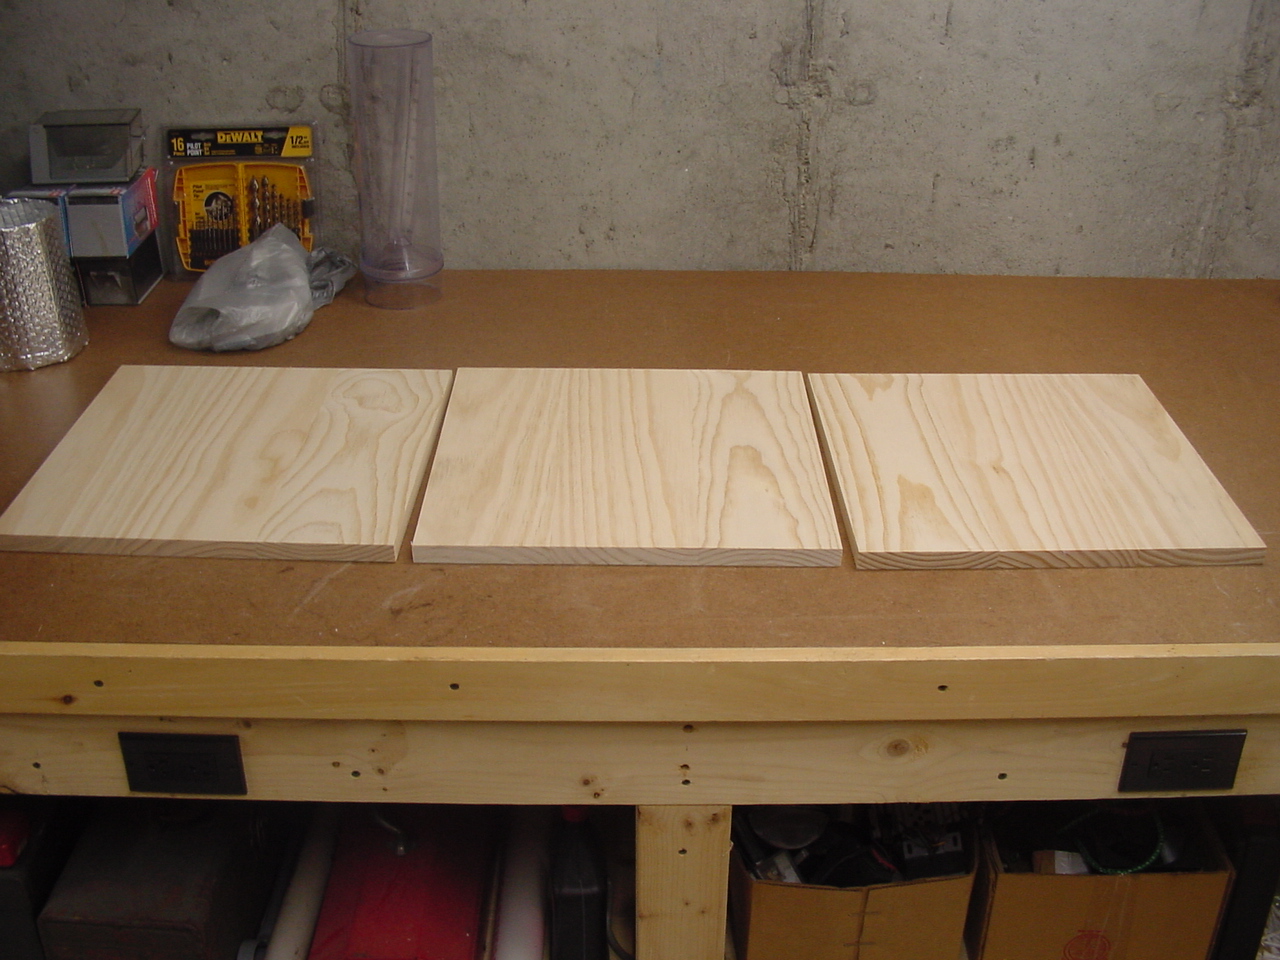
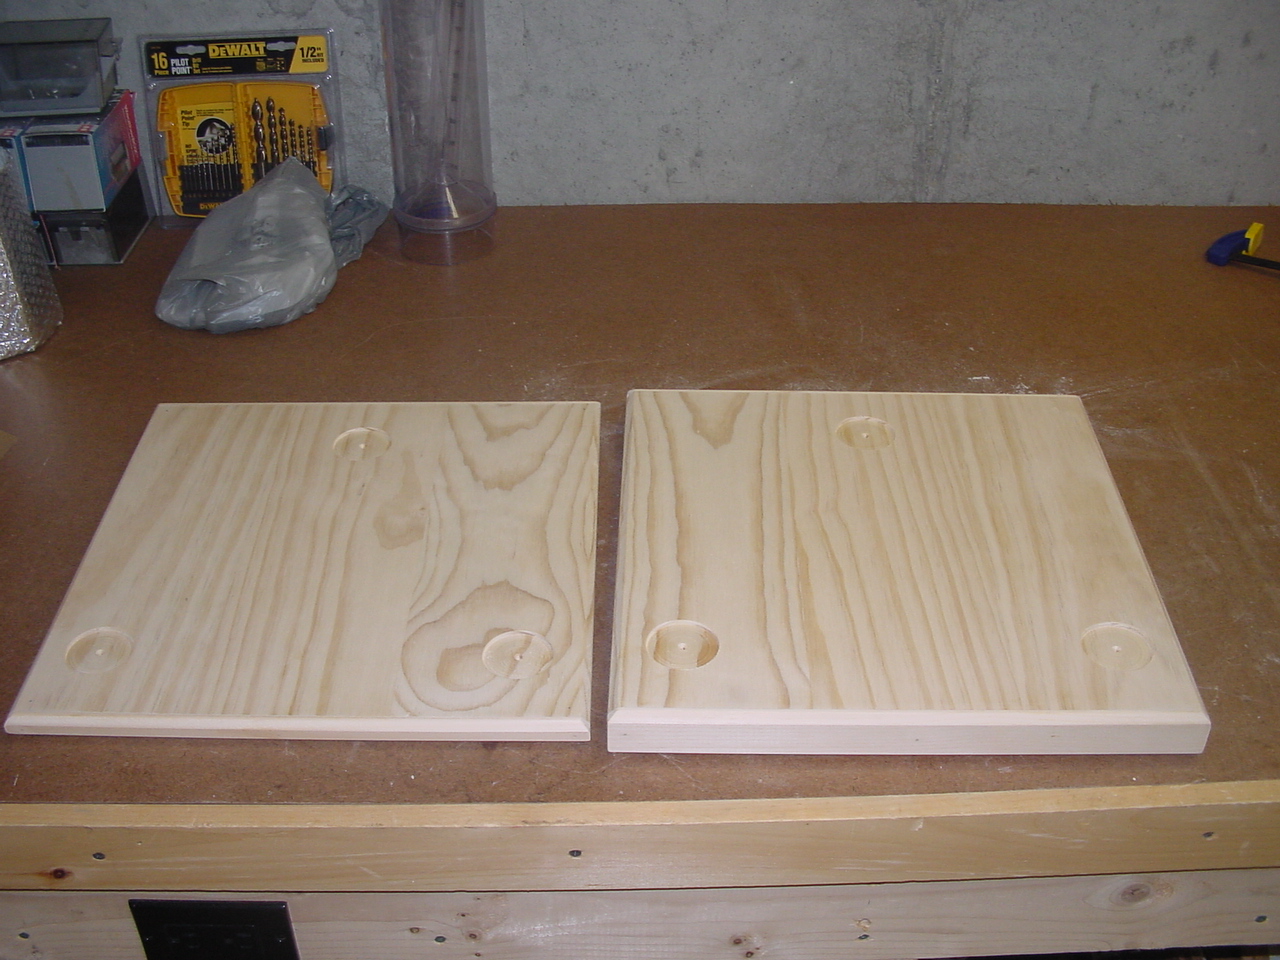
| Piece of 16" X 48" X 3/4" board from Lowes ($13.95) | Cut into three even pieces ~ 15
1/2" X 16" (The base of the speaker measures 14" X 14') The reason for making the Isolation base larger than the speaker base is so the screws that will holder it together while installation can be removed after the speaker is sitting on it. You'll see this a little later. |
The top piece I wanted stronger than a simple piece of 3/4" thick board, (didn't want to take a chance and have it split in half) so I glued two pieces together for a piece 1 1/2" thick. |
 |
 |
 |
|
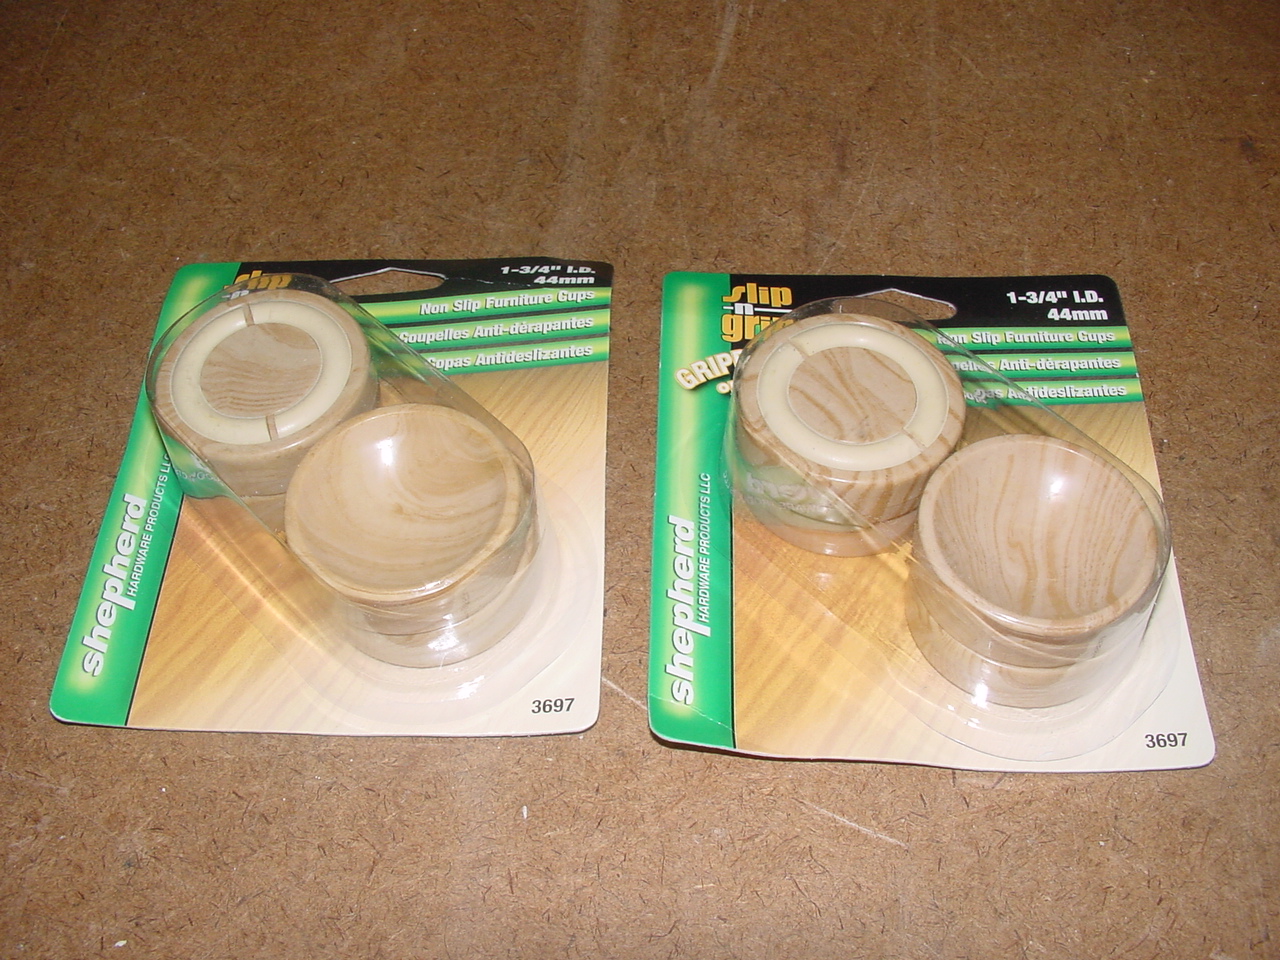
These are the furniture cups the steel balls sit in. ($7.29 a set from hardwareandtools) Three sets are used. |
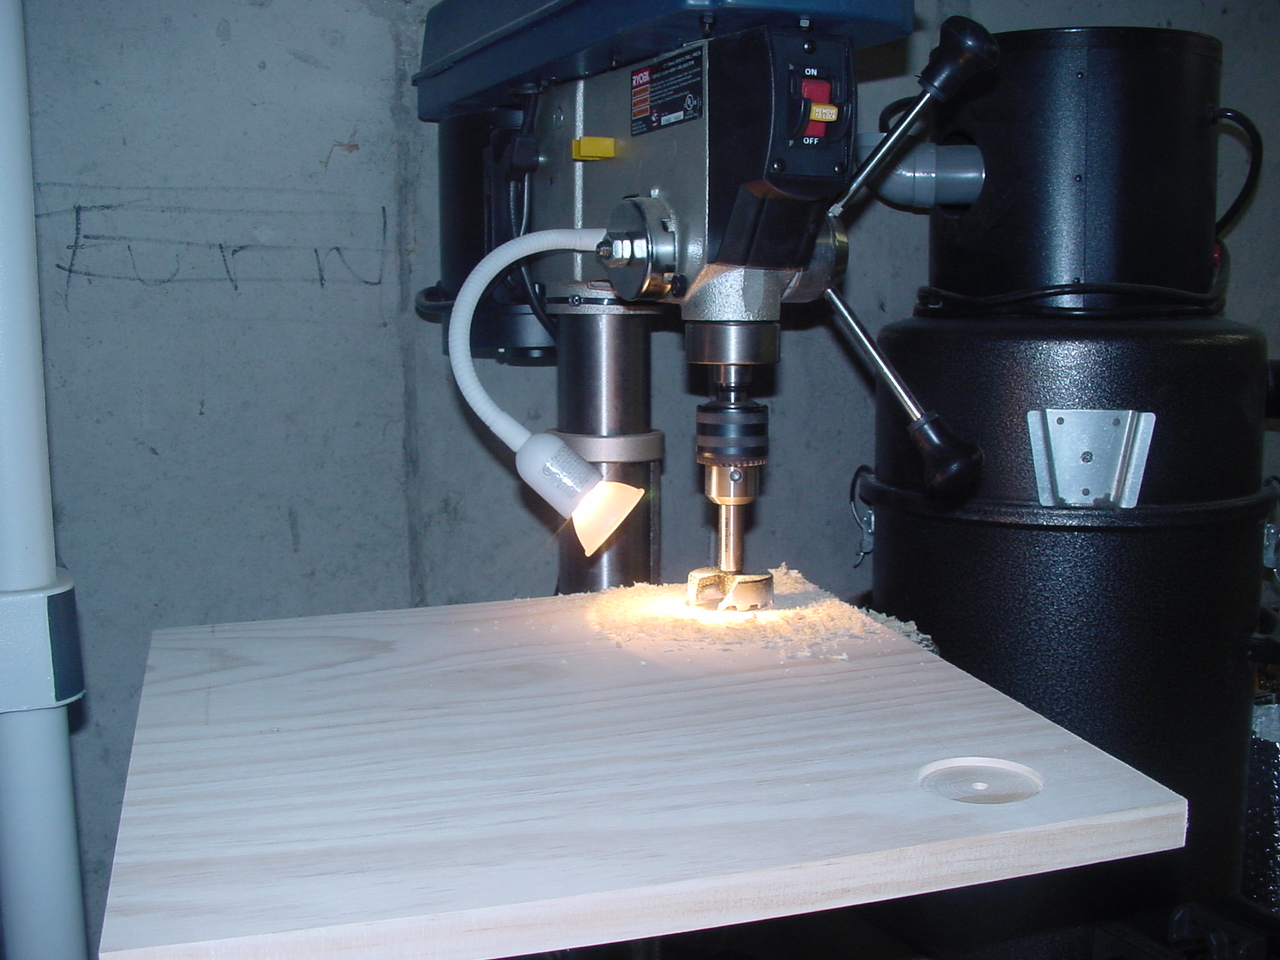
Boring 1/8" depth holes in the bottom piece for the furniture cups to sit in. The three counterbores will form a equilateral triangle . The distance between the cups is just larger than the base of the speaker to help keep it stablized. After drilling the counterbores a 1/16" hole is drilled through the board in center of each counterbore. This will allow the board to be used as a template for locating the position of the counterbores in the the top board. |
The three counterbored holes in the bottom piece. Having the counterbores helps to keep the cups in exact placement when sandwiching to top and bottom pieces together. Also a trim piece is put on each end of the board to hide the wood grain. (It also make the board square 16" X 16". The original cut was 15 1/2" X 16") (A trim piece is also put on the top board for the same reasons.) |
 |
 |
 |
|
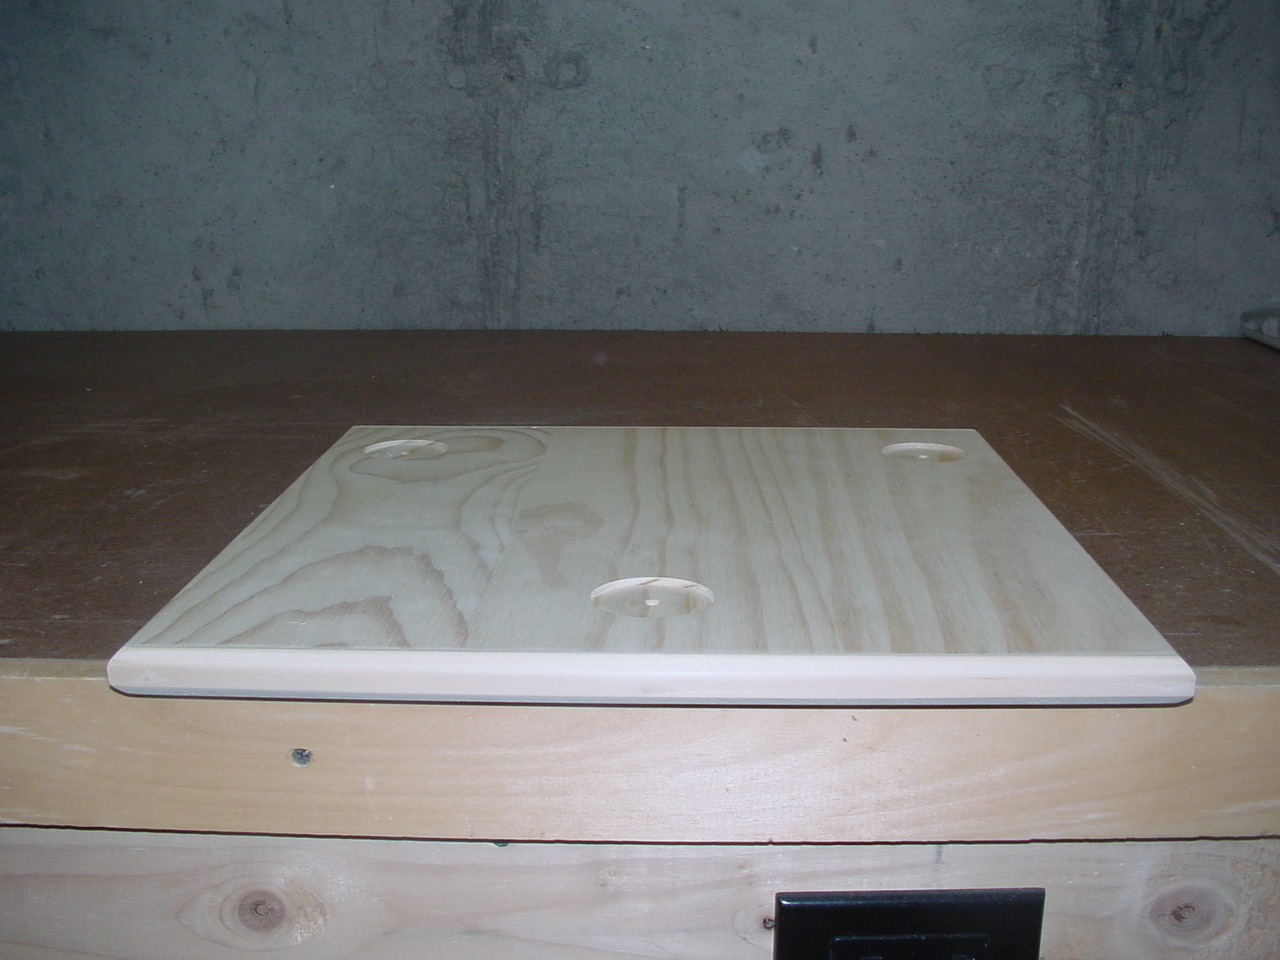
This the bottom bottom piece with the counterbores and a 45º chamfer cut on both sides all around. I think the chamfer helps to dress it up a little. (The top piece also has a 45º chamfer cut all around) |
Now the bottom board can be used as a template to locate the position of the counterbores in the top board. A 1/16" drill drills through the existing 1/16" holes in the bottom board into the top plate. This show where to drill the counterbores in the top board. Now the two boards will be a mirror image of each other. This help to keep the two boards centered with each other. |
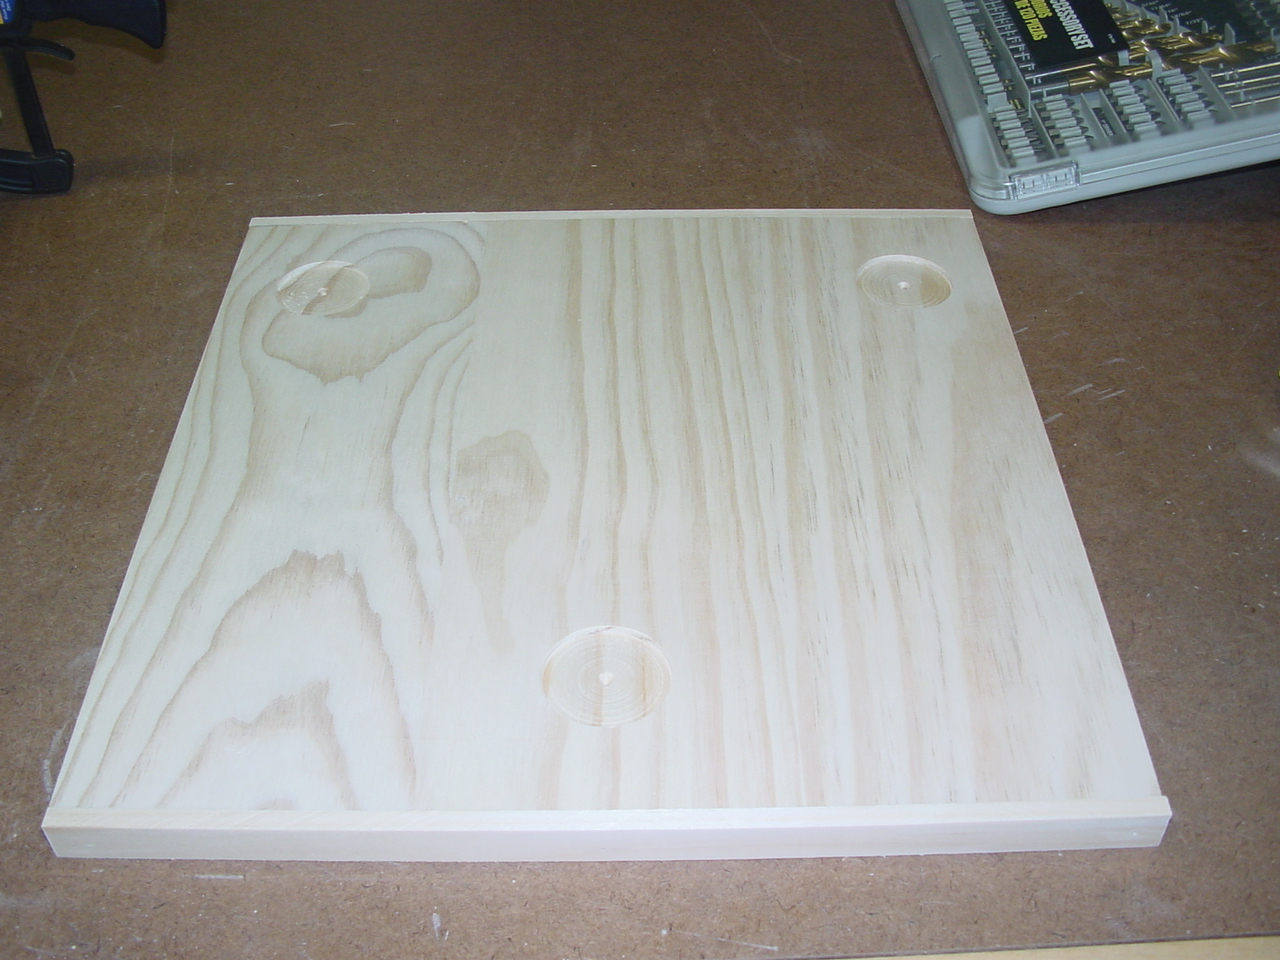
Top and bottom boards with the counterbores....a mirror image of ach other. The boards were sanded nice and smooth. |
 |
 |
 |
|
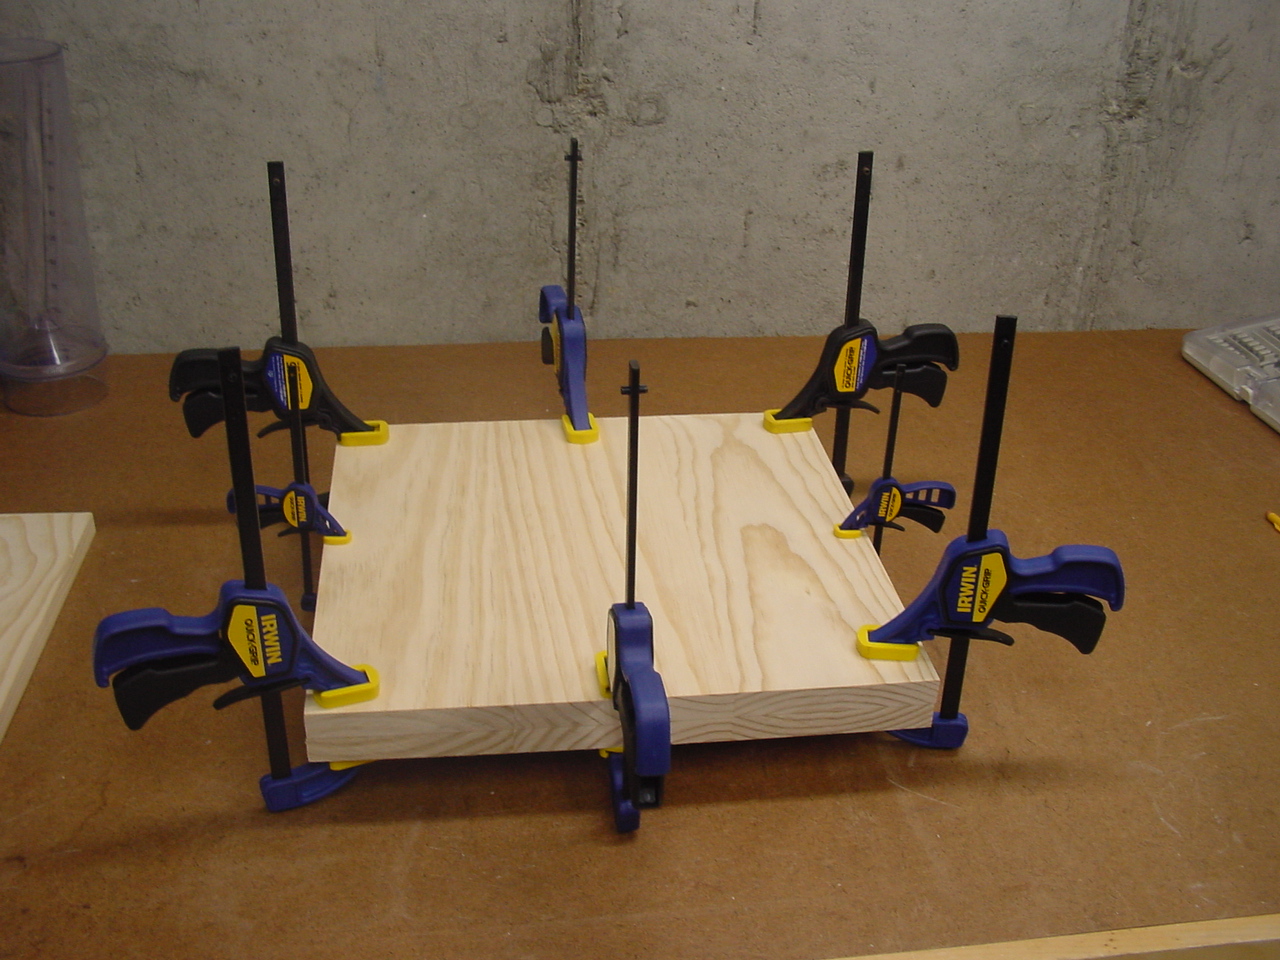
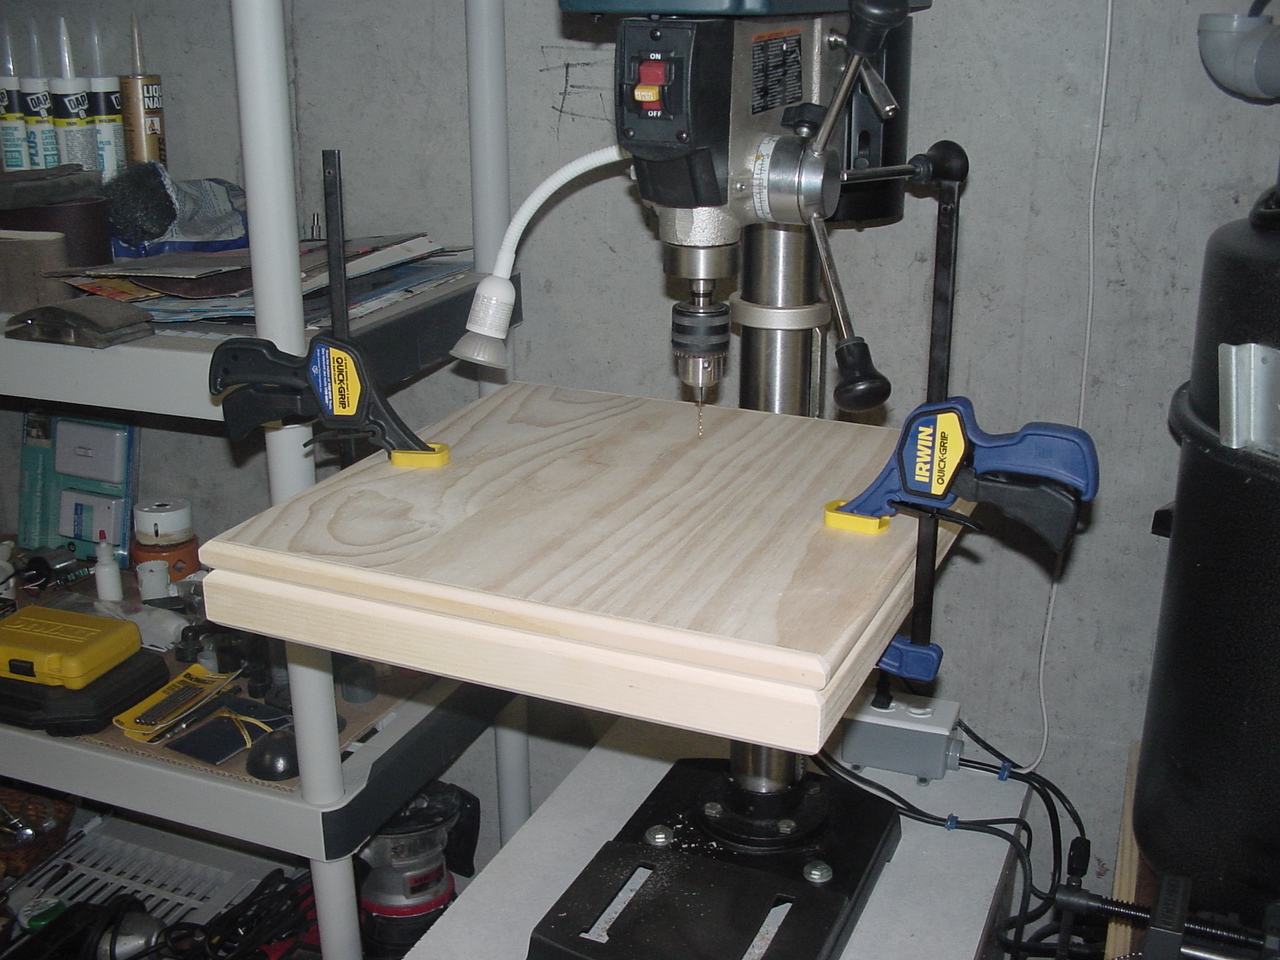
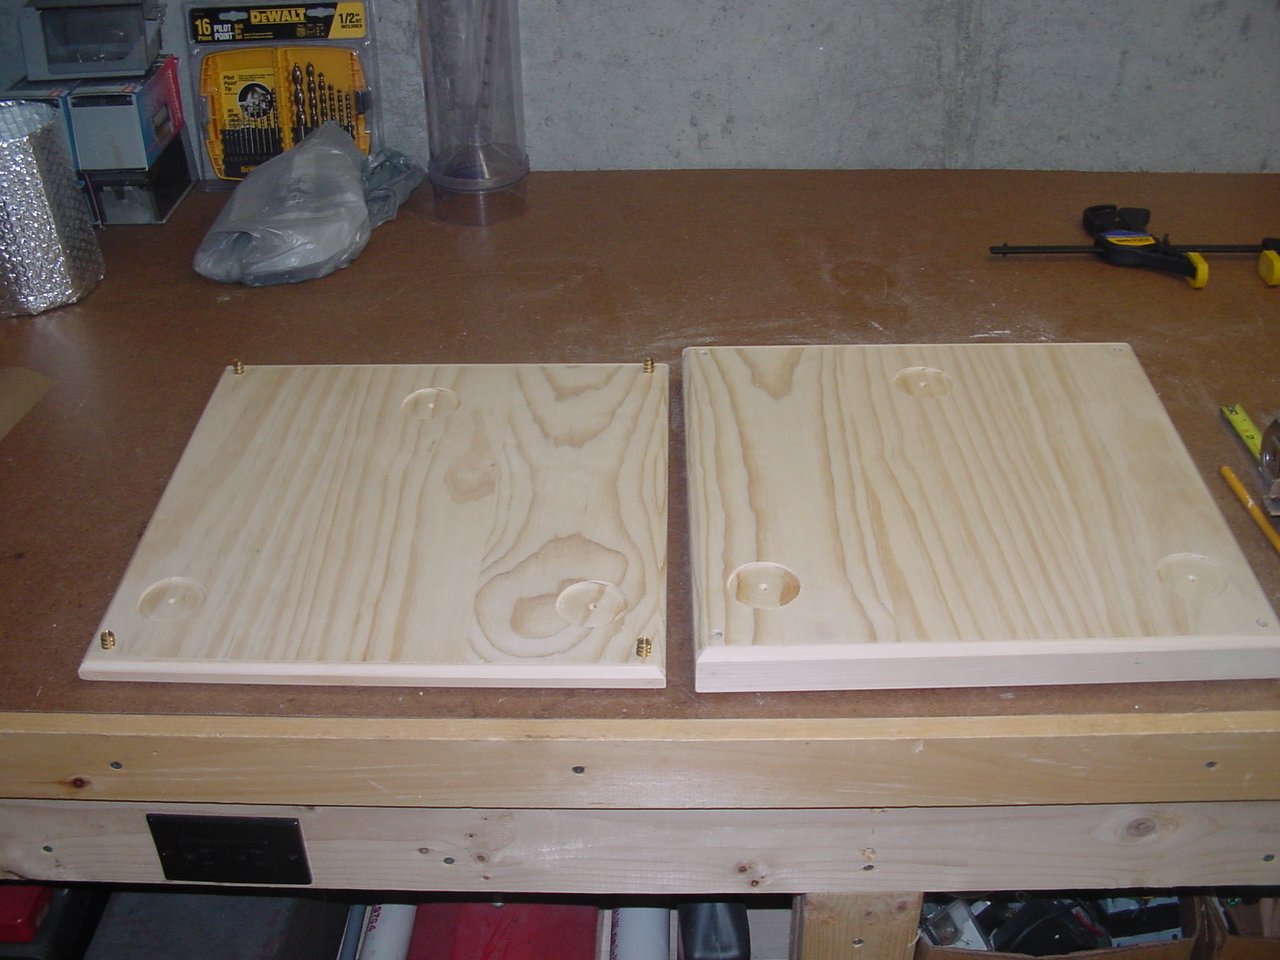
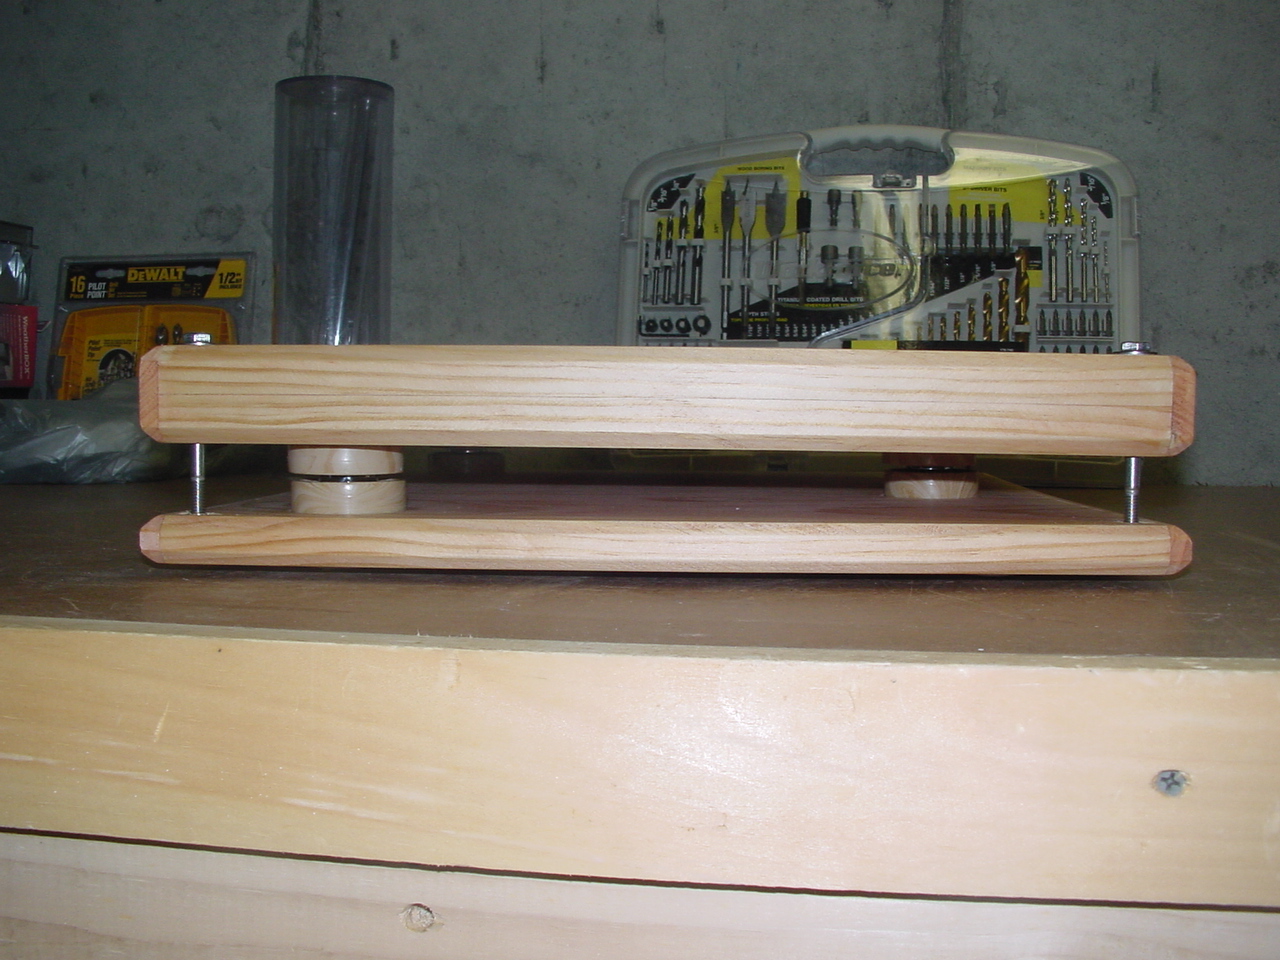
The two boards are clamped together and a 5/16" hole is drilled through each corner. The bottom board has a 1/4" X 20 brass threaded inert screwed in each hole. (Threaded inserts $3.00) |
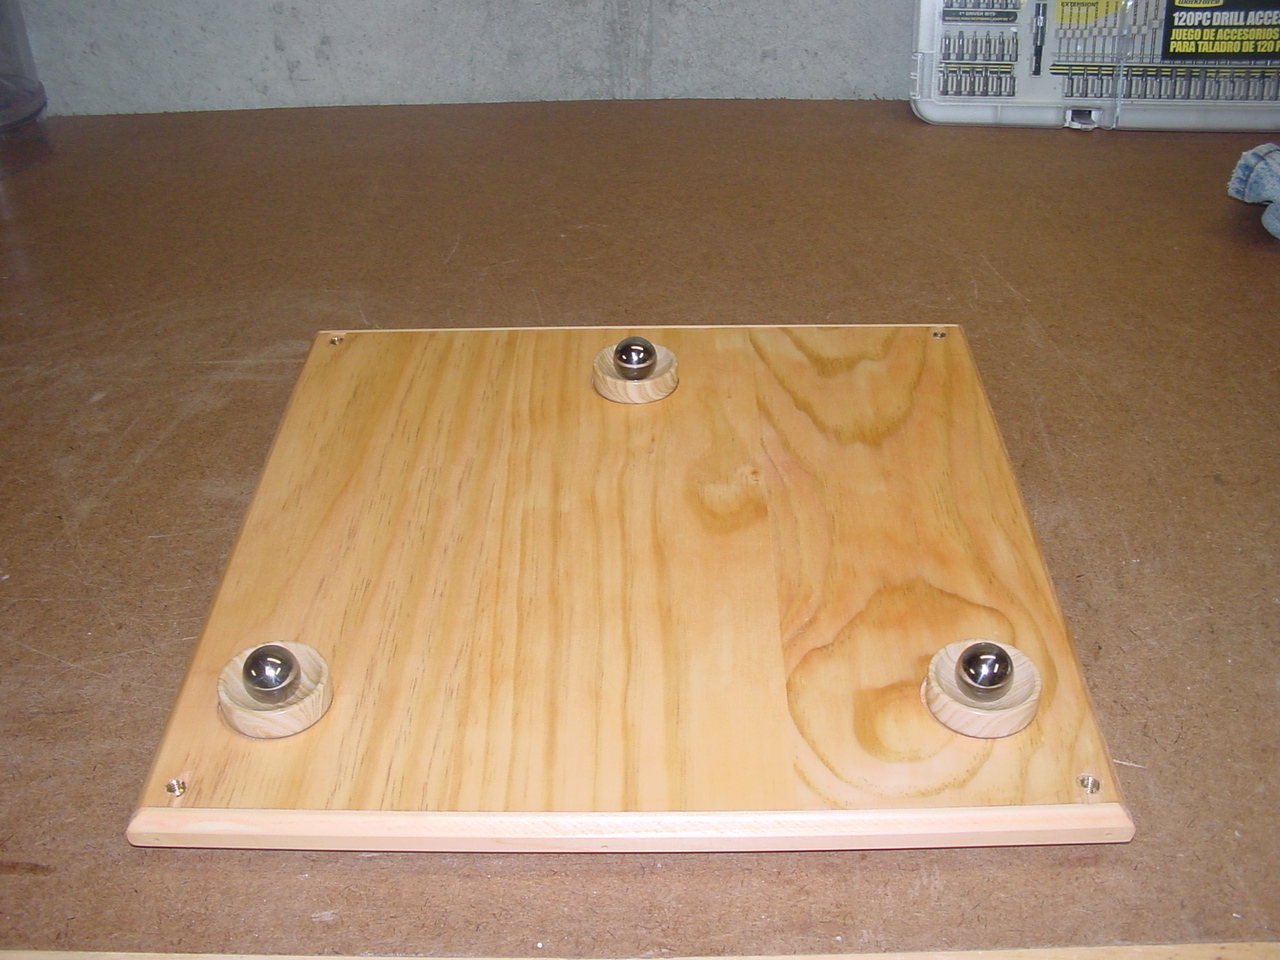
Ok, we're almost there. The brass inserts are inserted, the boards are stained (stain $4.00) and the cups with the steel balls are placed in the counterbores in the bottom board. |
Cups are placed on top of the steel balls. |
 |
 |
 |
|
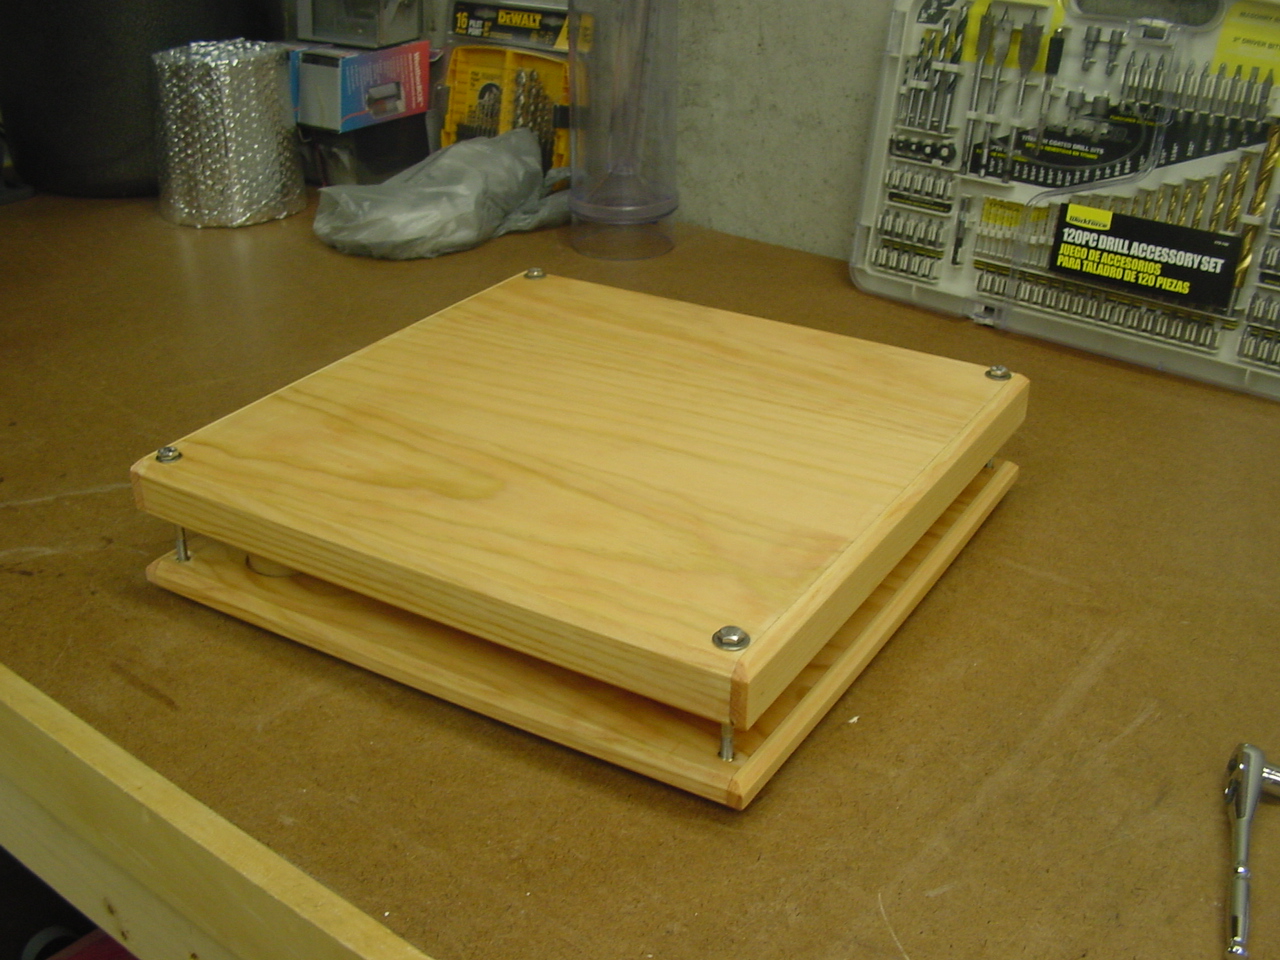
The two boards are screwed together with 3 1/4" X 20 bolts. (The bolts are only snugged up, no need to tighten the beejesus out of them!) |
Another view of the two boards assembled. |
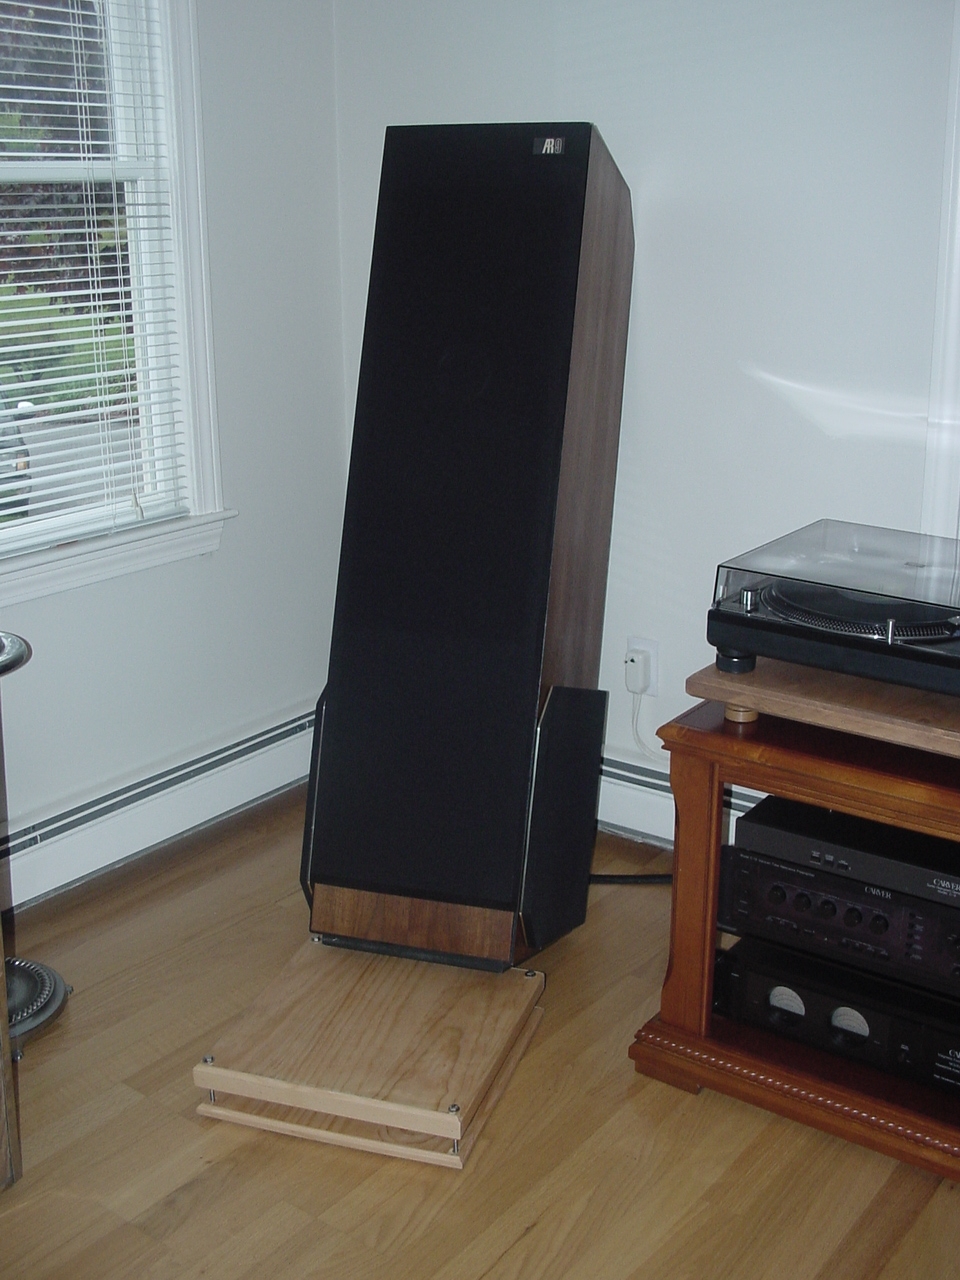
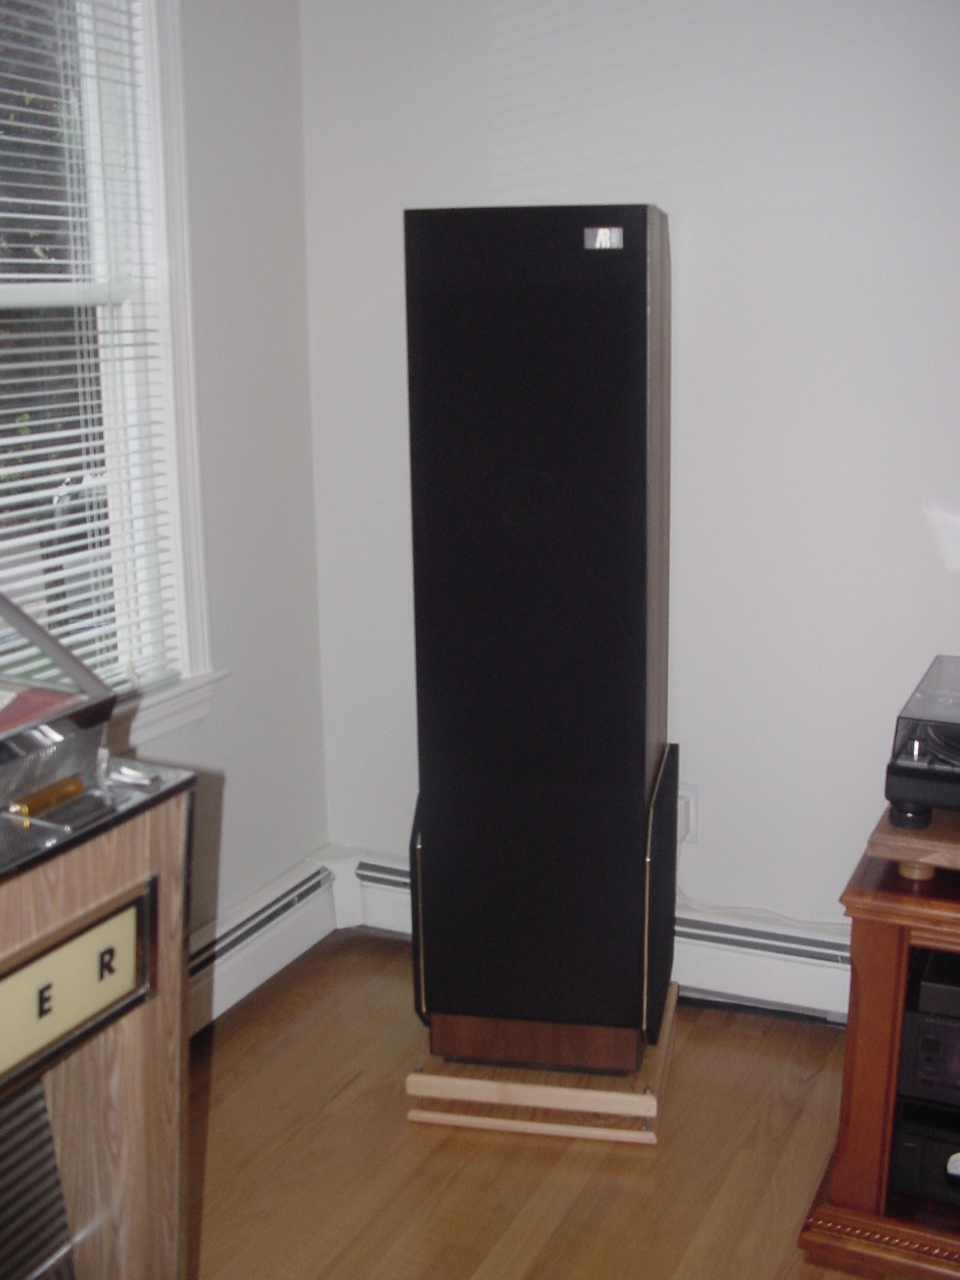
Now the fun part! I tilled the speaker against the wall and slide the base under it.....very carefully! Remember, these babies weigh 130 lbs each! |
 |
 |
 |
|
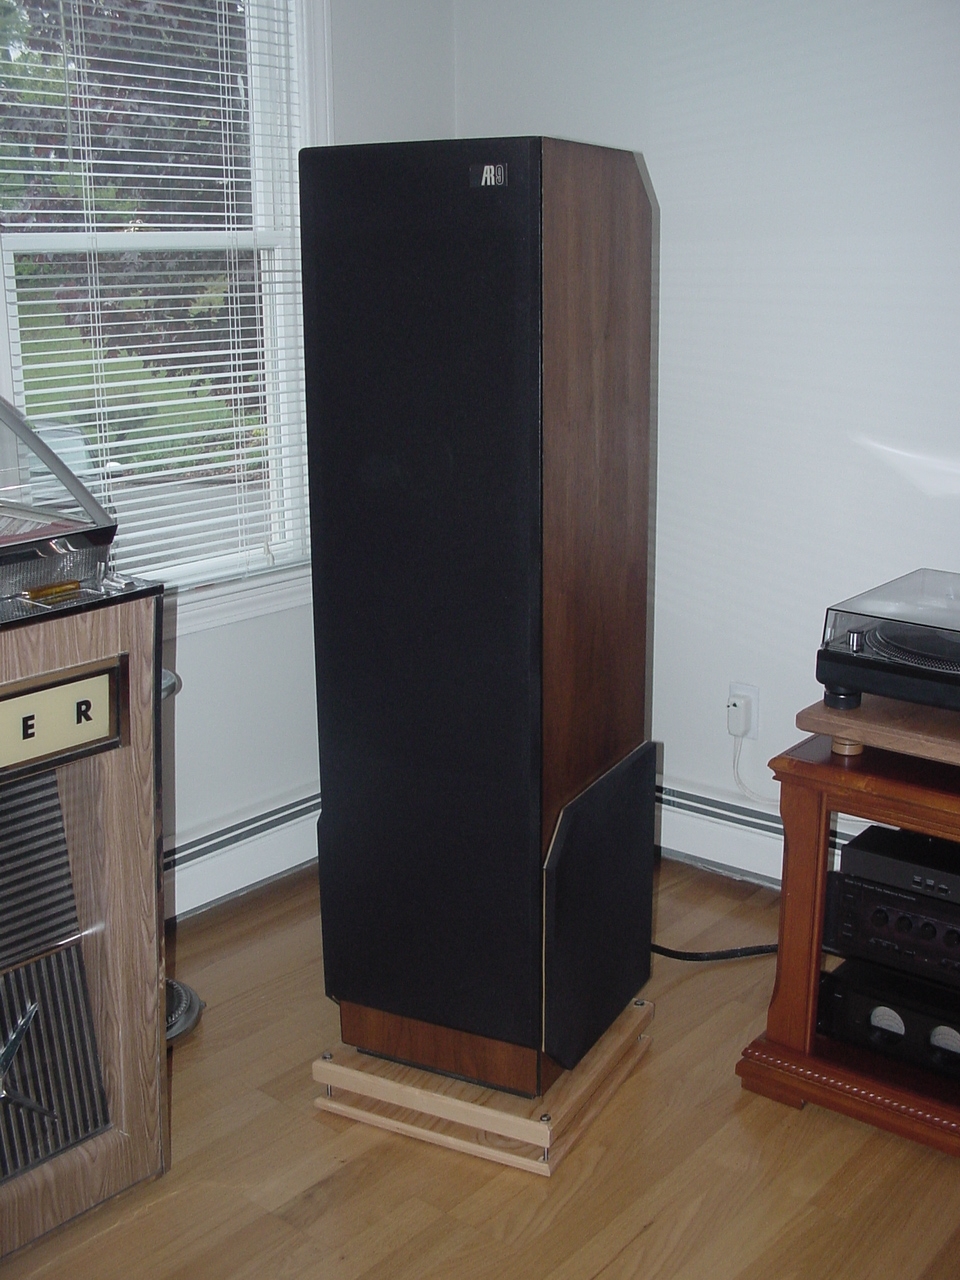
WOW, that was easy! I walked the speaker right up on the base without any problem at all. |
Another pic of the speaker on the base. |
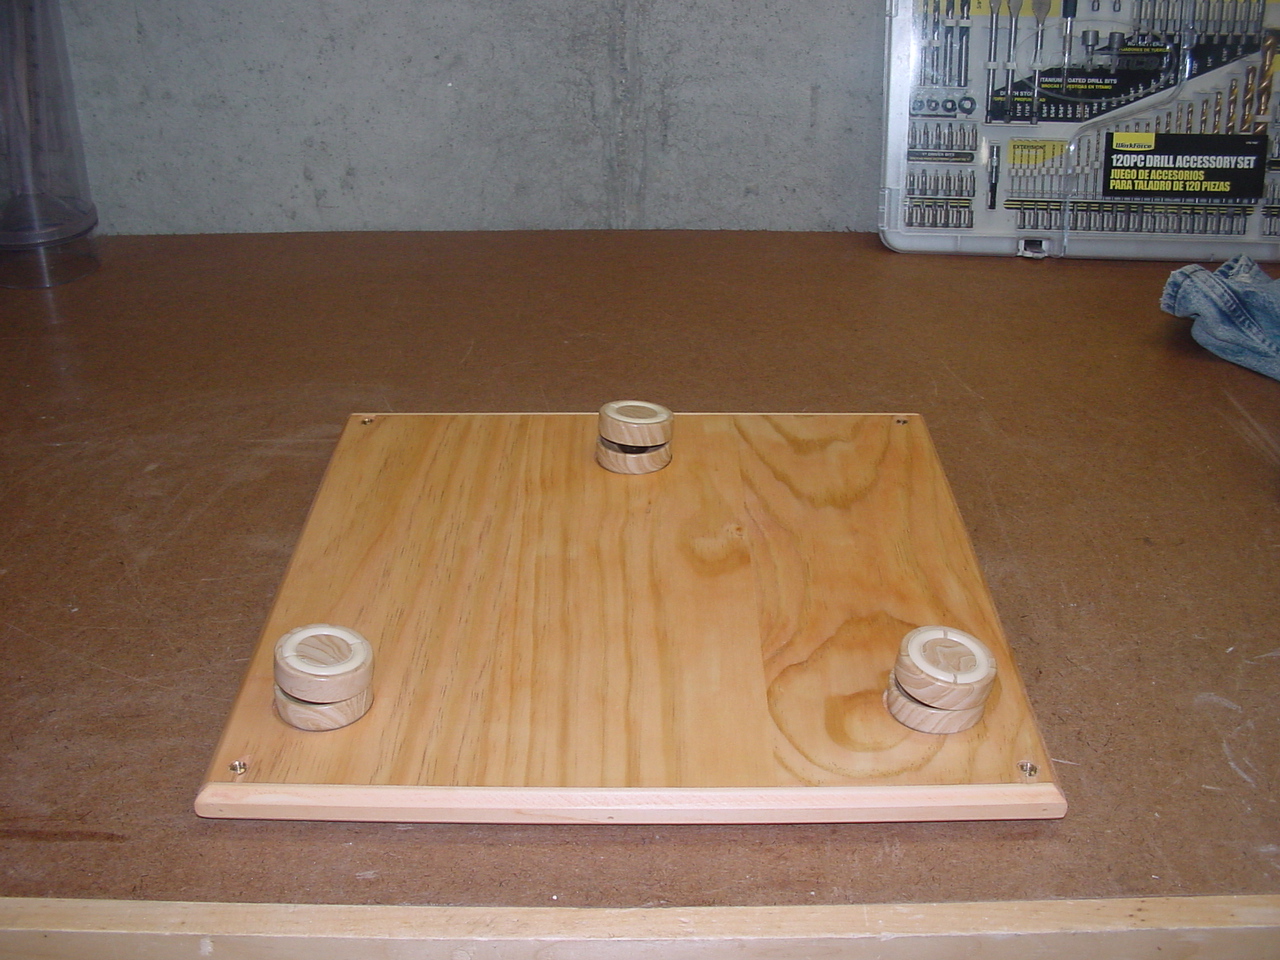
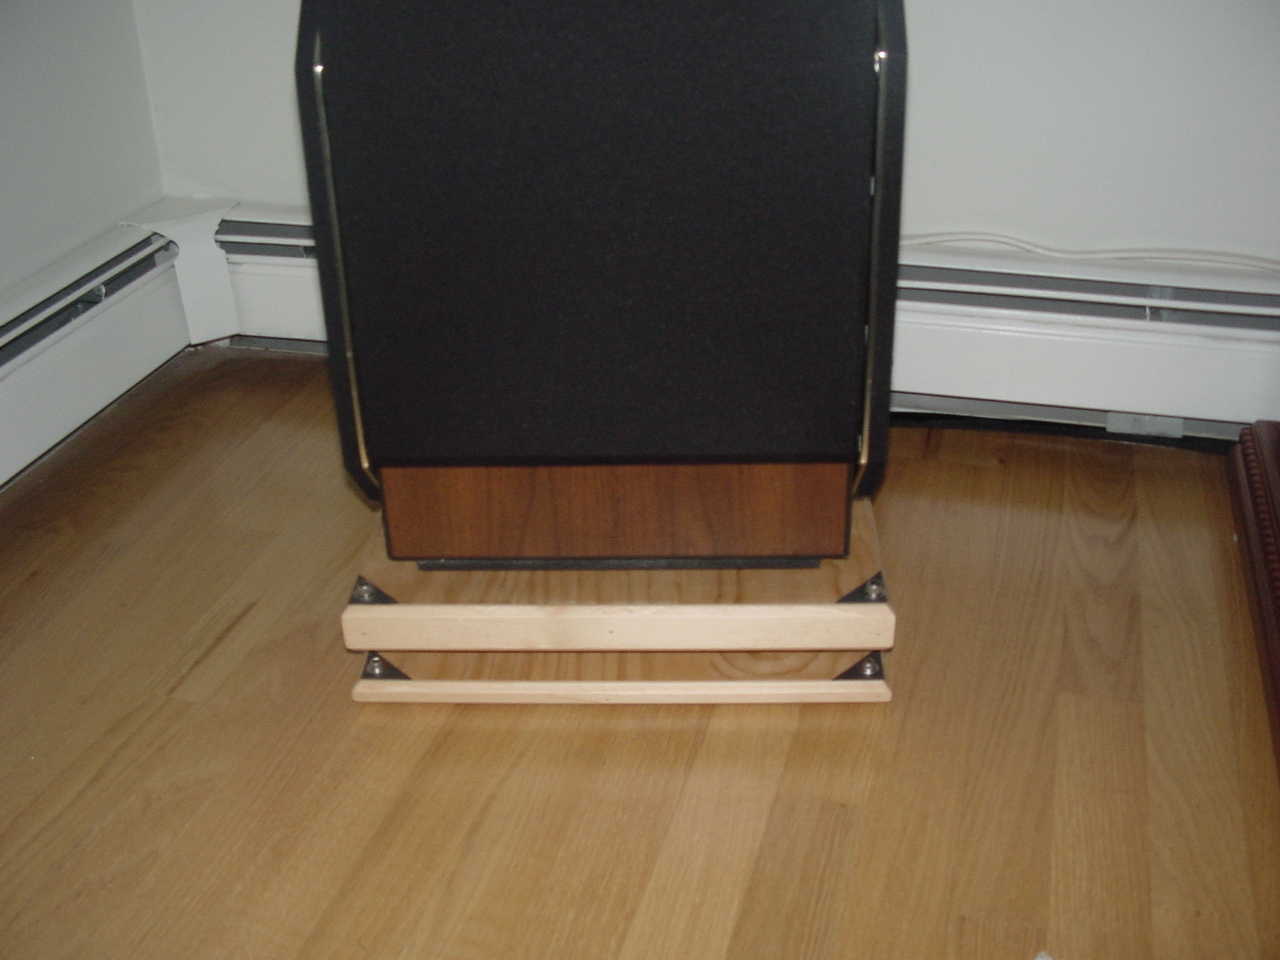
As you can see there was plenty of room to remove the screws holding the two pieces together. Then I put a short screw in each hole just to dress it up. The black triangle in each corner is a very thin piece of rubber just for decorative purposes. Not sure if I like it that way or not. I might remove the rubber pieces and see how they look. |
 |
 |
 |
|
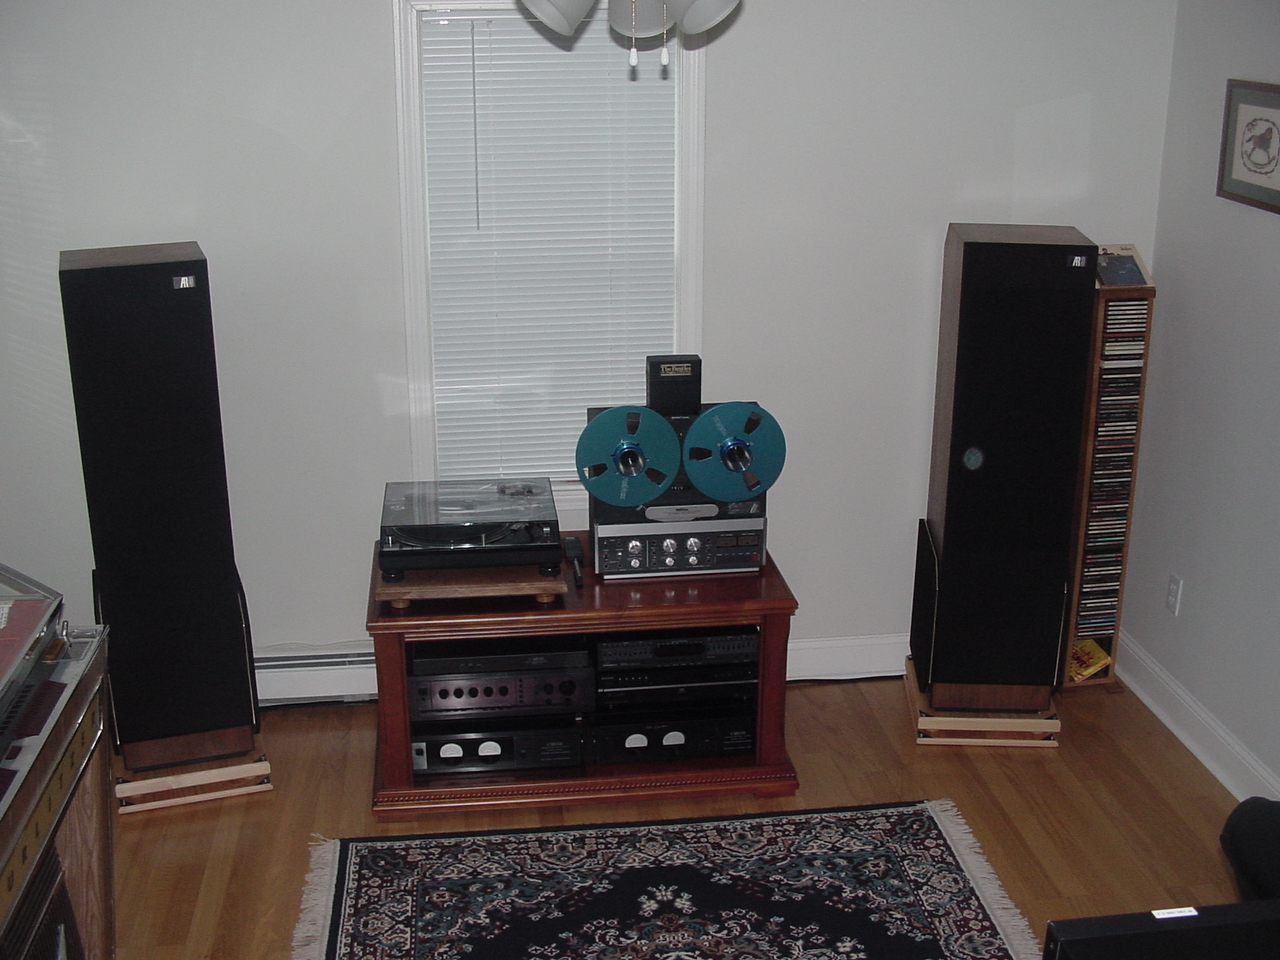
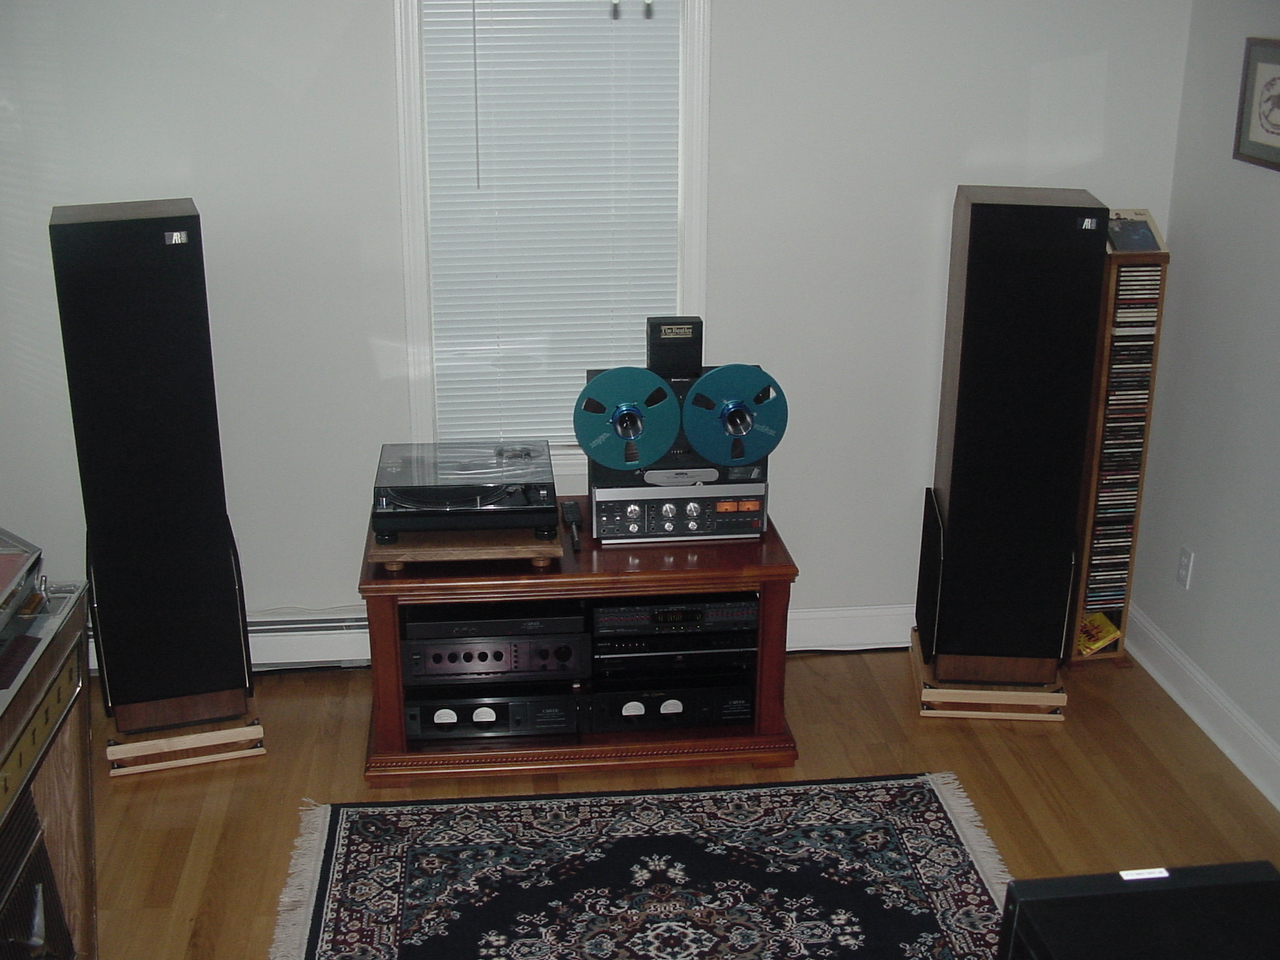
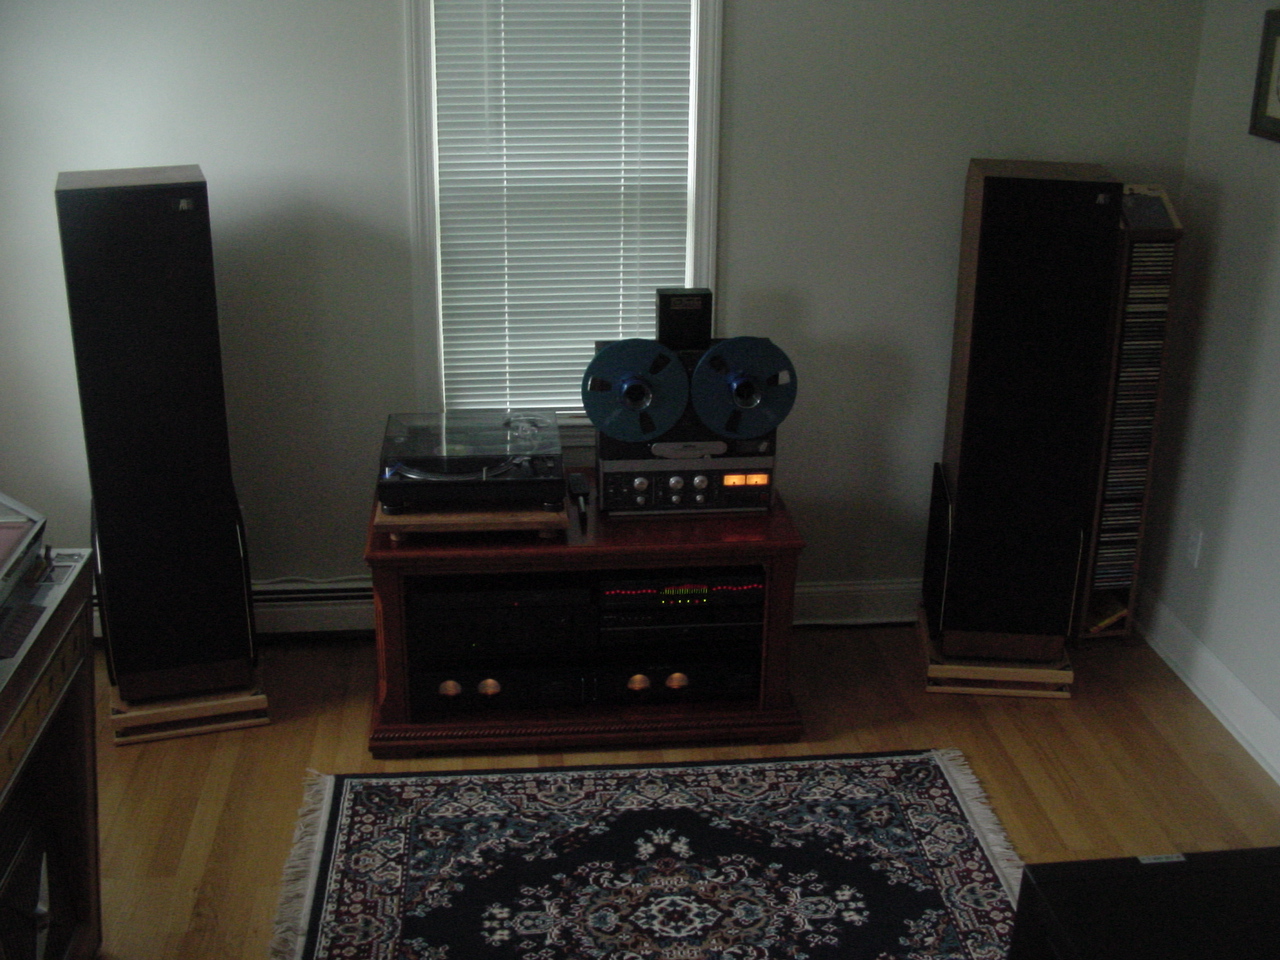
The finished product! |
Another pic of them..... |
and another.... |
as for the result......... was it all that worth it????? You bet it was! The imaging seems to be more pronounced and I'm hearing bass I never hear before! I can't guarantee this will make a difference for anyone else.....but what have you got to lose??? And thanks for looking...... John |